
Petoi Web-based Curriculum
Table of Contents
🐶 Intro: Making Robot Dogs
This guide by Petoi covers all-in-one lessons for robot dogs using Bittle X. These topics go from the initial setup of the robot dog, to getting started with Petoi Web Coding Blocks, and finally to sensors for Bittle X —all through hands-on projects and lessons.
These lessons are aligned with California Computer Science Standards as well as robotics standards. They can also be used in cross-cutting topics such as Math. The lessons and projects specify the standards that the projects relate to. For more information on California Computer Science standards, see here: https://www.cde.ca.gov/be/st/ss/documents/csstandards.pdf
Note that this curriculum doesn’t cover the assembly process.
🐾 Using Bittle X V2?
This curriculum was built for the original Bittle X. If your robot has BiBoard V1 (check the label on the board — the Grove connectors are on the top surface), you have a Bittle X V2. Follow the Bittle X V2 User Manual for hardware-specific steps. Callouts like this one throughout the curriculum will point you to the right V2 page wherever things differ.
🐶 Topic 0: Robot Dog Teacher’s Supplement: An Educator Guide to Bittle X
Overview
The intention of this curriculum is to develop foundational programming and robotics skills in students in upper elementary through high school classrooms. The lessons are intended to be approachable for students and educators who are not yet confident in their robotics knowledge, while providing opportunities to challenge those who have programming skills to engage more deeply with the Bittle X system.
There are more extensive, in-depth supplemental materials provided through Petoi if you are interested in more background and technical details regarding the robots you will be using. This curriculum has been written to be streamlined for educators so that it is easy to implement within the classroom, regardless of past programming experience.
Each lesson in the course builds on the knowledge and skills built thus far, and aims to provide as many hands-on learning opportunities as possible. Lesson plans, lab instructions, and this teacher guide that highlights key content knowledge will all be provided. This teacher guide will have instructional notes, key vocabulary to teach explicitly, and the standards addressed in the lessons. Individual projects will have a discrete chart showing the most applicable standards. If you would like a complete list of standards that can be addressed through use of the curriculum that is available at the end of the overview. Currently, the standards being used in the development of the course are from the California Department of Education.
The lessons will provide the information needed to conduct the labs that are assigned. You can check out https://guide.petoi.com/ if you are interested in more detailed information about Petoi, Bittle X dogs, or Nybble Q cats. These documents will help clarify any questions you may have, and will provide in-depth guidance about the systems.
Before beginning the lessons, please set up, or walk students through the setup, for the Petoi Web Coding Blocks that they will be using for the lessons. A guide for setup is in the Topic 1 section of the curriculum. It is a lengthy process, and should be done ahead of time in order to access the lab activities without delays.
Grade Span Notes:
Middle School:
Exit ticket: Have the students write down a portion of their code on an index card. Make sure to include what the desired task will look like if programmed properly (i.e., Bittle X will walk in a circle one time).
Warm up for the next class: recreate the code written on another student’s exit ticket. When each student has demonstrated that they have correctly recreated that code, then they can move on to the lab portion.
High School:
Maintain a debugging log as students move through the projects. Occasionally, have students simplify the steps to develop systematic troubleshooting strategies. As they develop more comprehensive guides, have them utilize each other’s systems to see if there are variations that might be more useful in their own strategies.
8-Week Curriculum
| Week | Lesson |
| 1 | Intro to Petoi, Hardware, and OpenCat + Quadrupeds Basic Coding |
| 2 | Basic Blocks |
| 3 | PIR Sensor - Single digital switch |
| 4 | Touch sensor - Multiple digital switches |
| 5 | Light sensor - Multiple analog switches |
| 6 | IR Sensor - Multiple analog switches |
| 7 | Gesture Sensor Movement editor - Multi-joint movements |
| 8 | Final Projects |
What can you create with Petoi Coding Blocks?
Make your robot dance and sing
Create custom behaviors
Build interactive responses
The best part? You're actually learning real robotics coding while having fun. Every drag and drop teaches you the same coding principles and foundations that advanced roboticists use daily.
🐶 Topic 1: How to set up Bittle X
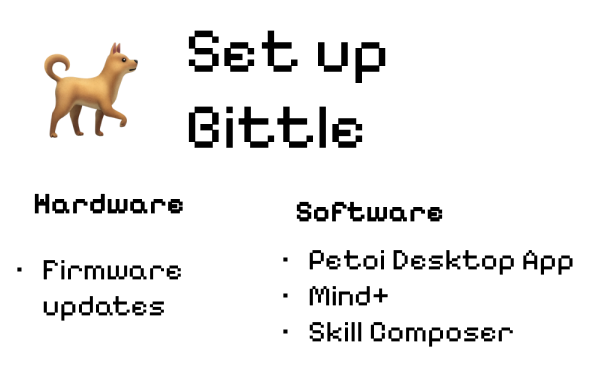
Introduction
In this lesson, we will:
- Learn the difference between Nybble Q and Bittle X
- Learn the parts of Bittle X
- Set up Bittle X’s hardware and software so that we can start using it for coding
- Learn troubleshooting techniques
Nybble Q vs Bittle X
If you have explored with the Nybble Q cat from Petoi you will notice many similarities between the two products. The programming process will be roughly similar, but due to differences in design, the available tasks will vary. Nybble Q has 2 more servos on its tail and neck, which increases the range of expressive movement. Bittle X is lighter and more compact without the additional components, and can therefore do additional tasks such as flips.
Nybble Q:
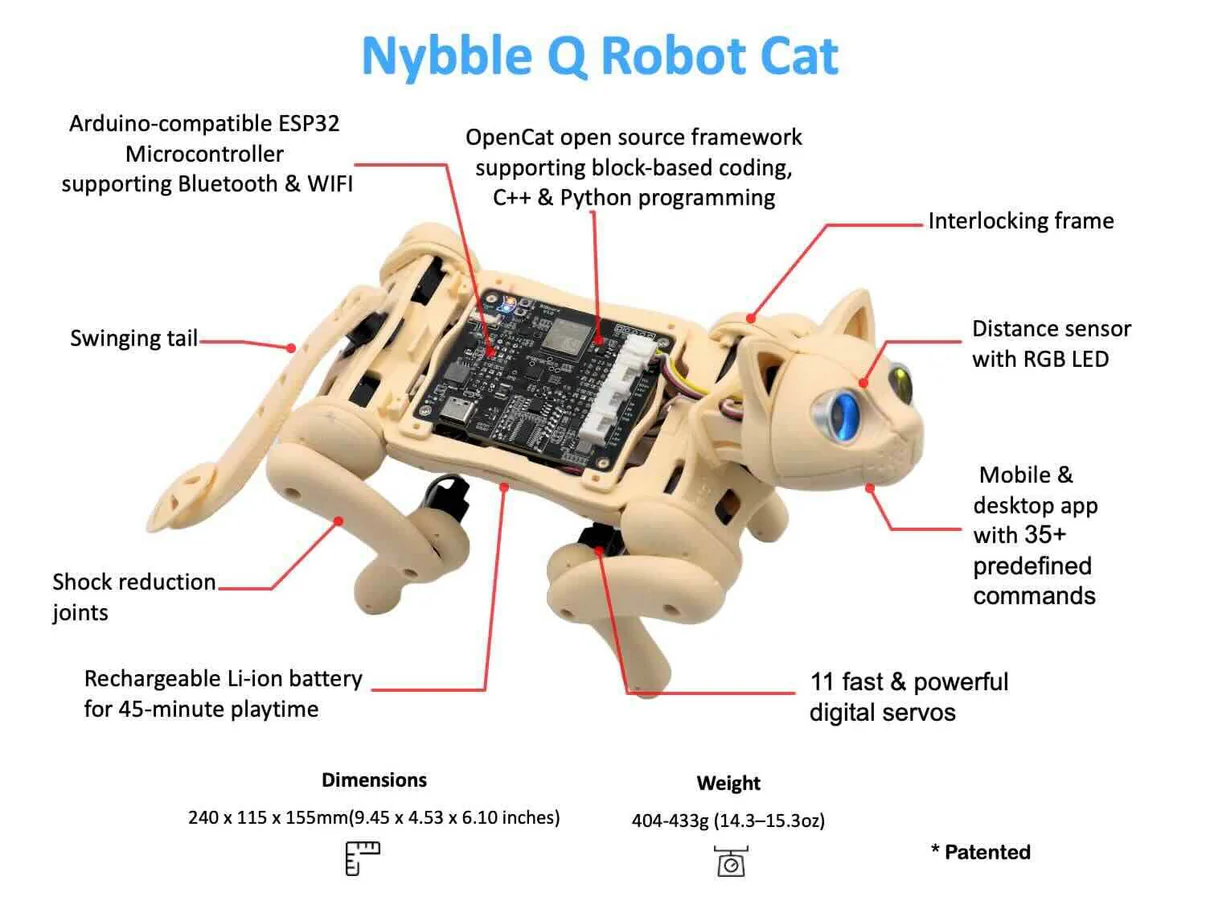
Nybble Q documentation can be found here:
Bittle X
Bittle X is the robot dog that we will be using in these lessons.
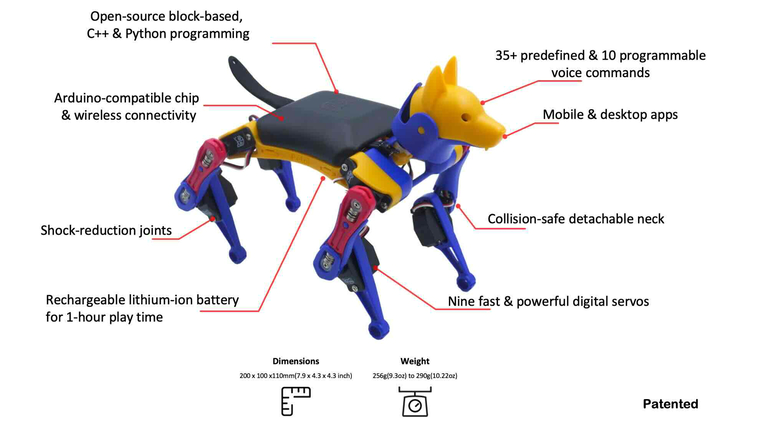
Introduction
This lesson shows how to set up Bittle X so that you can start doing the coding projects.
Setting up Bittle X involves uploading the most recent firmware and making sure that the robot dog is successfully connected to your computer.
Instruction Summary: How to Set Up Bittle X
1. Get your computer ready and upload the firmware to Bittle X.
What are the computer requirements?
You can use any of the computers on the list. Here are our tips:
What do I need?
| Tools | Notes |
| A Windows/Mac/Linux Computer Or a Chromebook* | Download Petoi Desktop APP *A Windows or Mac/Linux is required to use the Petoi Desktop App to update the firmware. After that, a chromebook can be used. |
| USB cable (included in the kit) | **Note: Using a different cable that doesn’t allow data transfer might not allow code uploads to Bittle X ☠️ The data transmission port is on the BiBoard. It is used for uploading firmware and a proper connection to the computer for transferring data. The charging port is on the battery; a 5V 1A output should be enough. |
| A smartphone(Android/iOS) | Download mobile app (Optional) |
🐾 Using Bittle X V2?
Your box does not include an IR remote — BiBoard V1 does not support infrared control. You'll also find a flexible touch sensor (FPC) attached inside the back cover; this is normal and doesn't need to be removed. See the full V2 Unboxing guide for your complete parts list.
Tips
Bluetooth Connections
For Bluetooth connections to Bittle X, we noticed that Windows has an easier time with Bluetooth connections compared to Mac.
Chromebooks
For Chromebooks, Petoi Web Coding Blocks can run in the browser. However, the firmware will need to be updated by a separate computer, such as a Windows or Mac, since the Petoi Desktop App cannot be installed on a Chromebook.
2. Install the software
Follow this step-by-step guide to set up the Petoi Desktop App and the software required for your Bittle X.
- For Bittle X V2, follow this guide.
See the figure below:
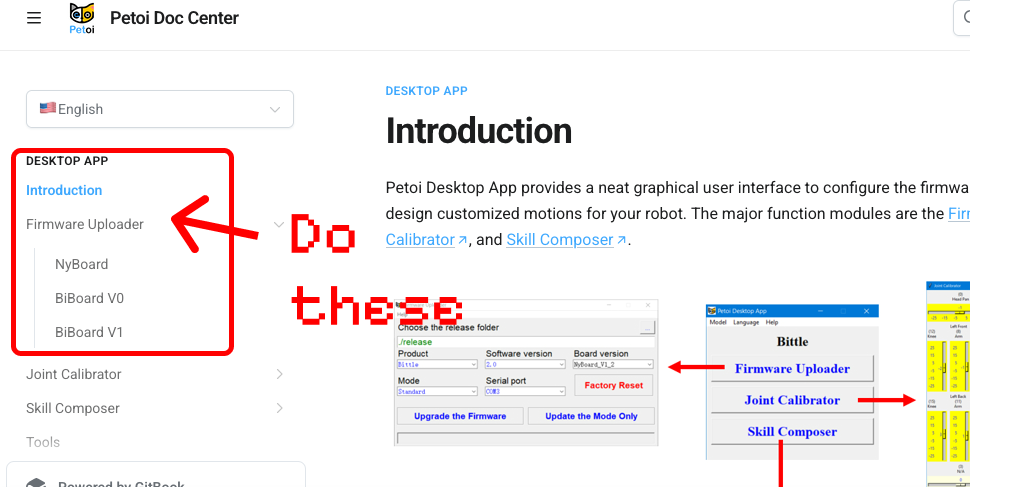
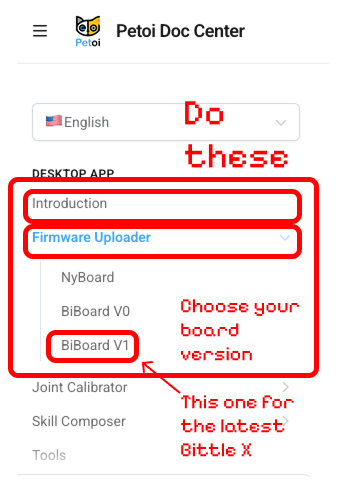
- For joint calibration: You may not need to calibrate the joints, depending on if the Bittle X you received is calibrated or not (if it moves properly). If it is not calibrated, go through the calibration steps either via the Phone app or the desktop app.
- For the Firmware Uploader, choose the board for your model.
- What board do I have? Check out the BiBoard V0 guide and the BiBoard V1 guide. Look at the different boards and see which one matches yours.
- For Bittle X V2, you can follow this Firmware Uploader guide and choose BiBoard V1
3. Set up Petoi Web Coding Blocks Software
Instructions
The Web-based block coding software run in a Chrome browser. You will need to connect to Bittle X either by Bluetooth, wired connection, or Wi-fi connection (Your Bittle X and your computer need to be on the same wifi or hotspot).
How to Troubleshoot Problems
Complete Documentation on how to set up:
https://guide.petoi.com/product/bittle-x-v2
Summary
- In this lesson, we learned how to set up Bittle X.
- We saw the differences between Nybble Q and Bittle X.
- We learned how to troubleshoot
🐶 Topic 2: Intro to Robot Dogs
Can be taught as the first portion of a 2-hour lesson, with Topic 3 as the remainder of the lesson
- Slides with easy “what is this” information about robots in general and Bittle X specifically
- Drive to download files
Vocabulary:
- Coding Blocks: Preprogrammed blocks that are linked together to create commands. They replace text-based code with visuals and allow users to chain together commands by dragging and dropping blocks to form a chain.
- Servo: A highly specialized motor designed for precise control of rotary or linear motion. It allows for delicate and highly calibrated movements.
- Hardware: The physical components of a computer or robot
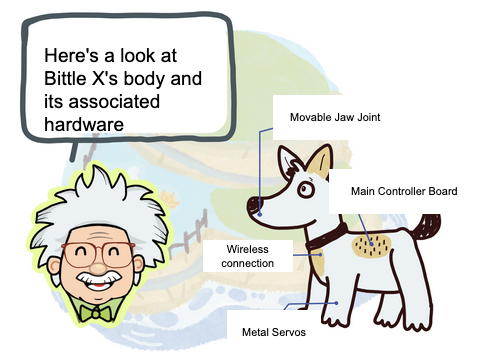
- The hardware on a Bittle X dog includes
- 9 servos controlling its joints, to allow it to perform tasks and tricks.
- A movable jaw joint
- A main controller board
- Wireless connection
- The hardware on a Bittle X dog includes
- Software: a set of instructions, data, or programs used to operate computers
- Firmware: Firmware is a type of software program embedded into hardware devices to help them function smoothly. You can think of it like permanent software.
How does Bittle X work?
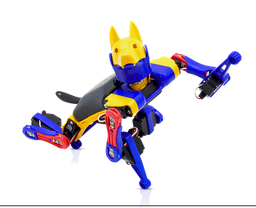
In this course, we use Bittle X, a bionic robot that mimics the shape and movements of a real dog. It adopts the joints of legged animals to reproduce realistic movements. The soft and elastic materials and spring-loaded legs can protect the servos from damage by heavy shocks.

What’s Bittle X made of?
Bittle X is made up of a microcontroller (an onboard computer) that is Arduino-compatible, and it uses motors (servos) that allow it to move around.
How do robots behave?
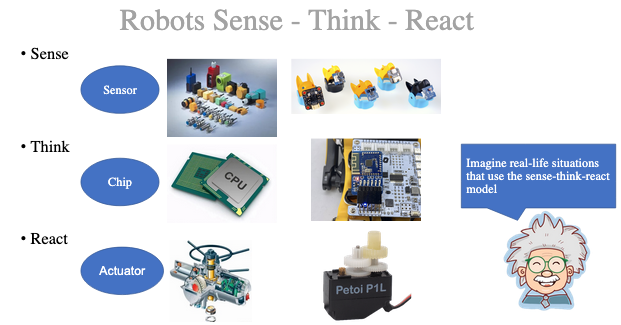
Robots have sensing, thinking, and reacting.
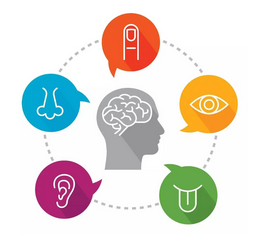
Humans have different senses— we perceive the environment. After that, we remember it (in our brain) and process the things that we experienced. Then we react based on our experiences.
In the same way, a robot dog will sense the environment, gather data on what is around it, and then process what it learns. However, the brain is a chip, such as a computer. And the robot dog will react by moving with its servos or making sounds with its speakers!
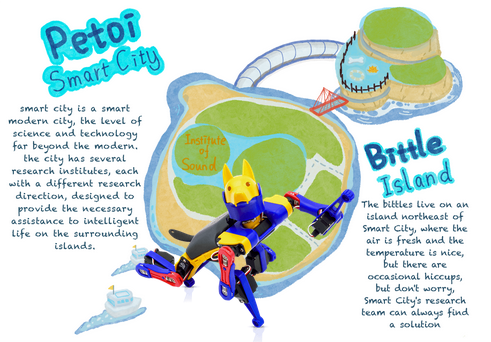
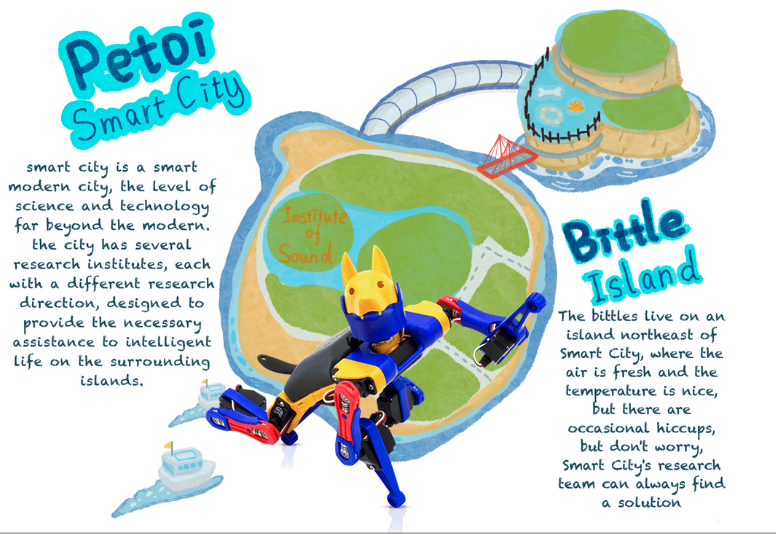
Bittle Island
If Bittle were an island with different towns and research buildings, then it would be a Smart City! ( Bittle is the family name of Petoi robot dog. Bittle X is part of this family)
Bittle Island has many features that showcase the robot’s abilities.
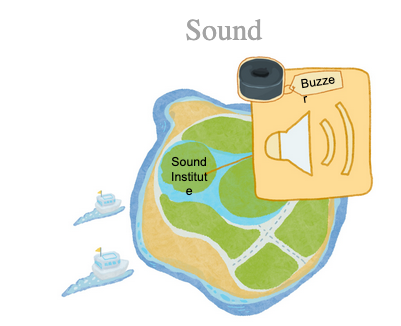
- Sound Institute - Sound
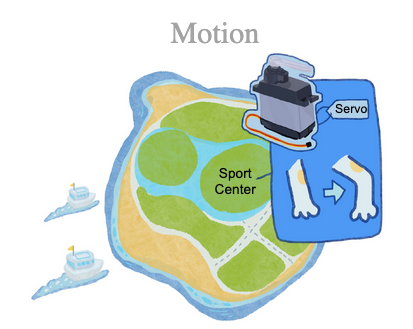
- Sport Center - Motion
- …and more
Summary
- We learned what robots do, what they are made of, and how robots behave similarly to humans.
- We learned what Bittle X can do, from movement to sound.
🐶 Topic 3: Teach Bittle X a New Trick with Code Blocks
What You’ll Learn
- We will learn how to program Bittle X to move using coding blocks.
- Singing Bittle X - Train Bittle X using the Petoi Web Coding Blocks to show a personality through moods, such as happy, sleepy, or sad. Use sounds and movements.
- Pet Trick - How to program Bittle X with custom tricks using the Petoi Web Coding Blocks.
- And more projects where we will learn the functionality of Petoi Web Coding Blocks and Bittle!
Video tutorial
Introduction
Robot dogs have a lot of movement in them. Our robot dog, Bittle, already has pre-made tricks, such as jump, sit, be table, and many more fun movements. See the App section on and try out the different tricks.
But can a robot dog learn new tricks? We can use software to customize Bittle’s movements and create our own custom tricks. Let’s look at a few methods to do that.
The first thing we can do to train the robot dog is to use one of the following: (1) the Skill Composer, which comes along with Bittle software; (2) Petoi Web Coding Blocks; and (3) Arduino IDE, which is text-based coding. You can see this summary in Figure 1.
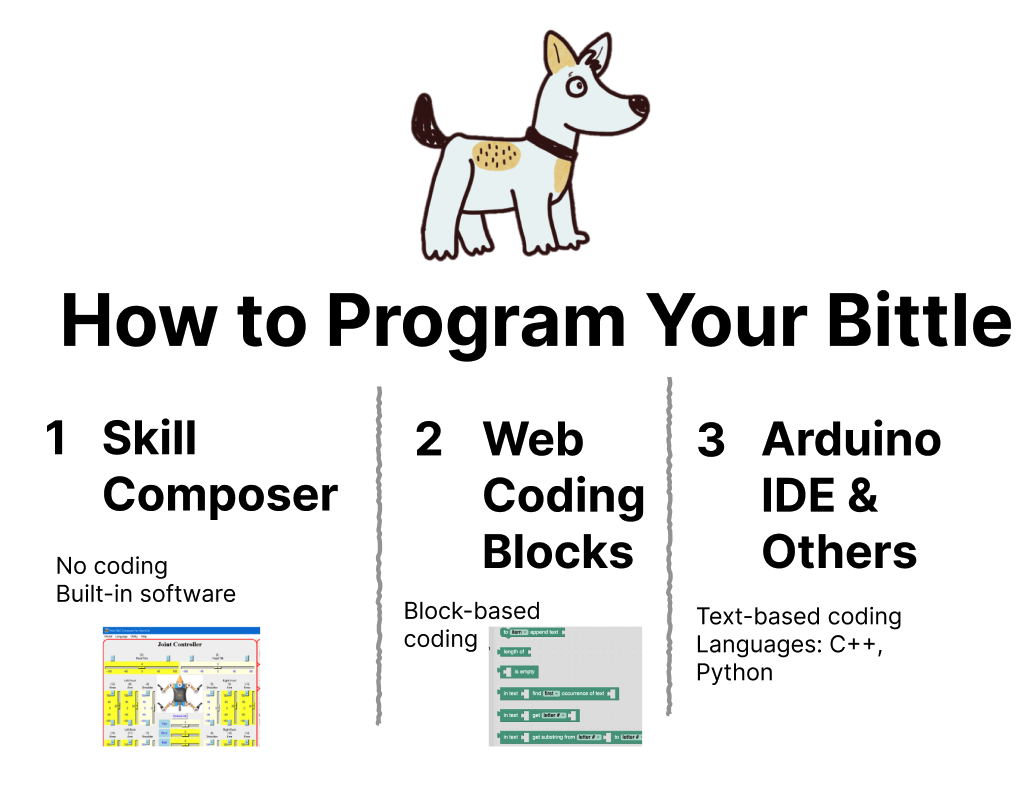
For these projects, we will start by using web block-based coding. For the Skill Composer tutorial, see the topic on using the Skill Composer to make the same project below.
Projects
✨ Project 3.1: Singing Bittle X - Train Bittle X to show a personality through moods, movements, and singing
✨ Project 3.2: Dance Choreography - Train Bittle X to Do a Dance
✨ Project 3.3: Make Bittle X Do Random Skills
Summary
In this lesson, we learned how Bittle X can be programmed using Petoi Web Coding Blocks to perform basic movements that can be made into a custom pet trick.
- Petoi Web Coding Blocks can be used to program Bittle for motion and sound.
- We can also use more sensors to incorporate into the coding blocks to program more projects.
🐶 Topic 4: Teach Bittle X More Motion
What You’ll Learn
- We will learn more about loops and conditions, and make Bittle move by incrementing variables.
Video Tutorial with Petoi Coding Blocks to Illustrate the Workflow Tutorial
Introduction
Coding blocks are used for making Bittle X go through a program that we create. There are lots of blocks in Petoi Web Coding Blocks.
Explanation of Joints and Joint Blocks
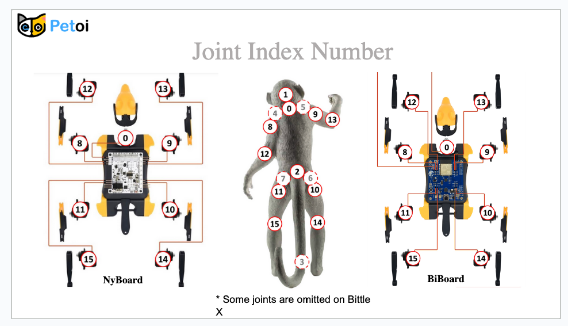
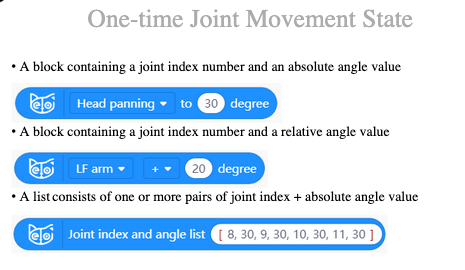
With Petoi Web Coding Blocks, the above will look like this:
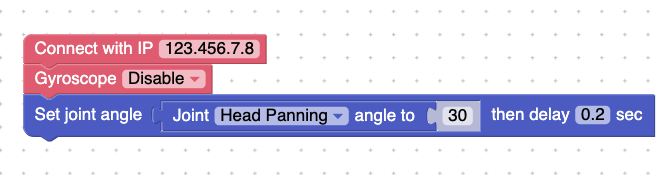
✨ Project 4.1: Move Bittle X’s Head and Joints with Loops
✨ Project 4.2: Obstacle Course - Make Bittle walk around objects in a simple obstacle course.
Summary
In this lesson, we learned more about how to use loops, conditions, and variables in Petoi Web Coding Blocks.
- We can evaluate code and enhance the performance and usability by using loops and variables.
🐶 Topic 4.5. - Teach Bittle X a New Trick Revisited - with Skill Composer
What You’ll Learn
- Pet Trick - How to program Bittle X with custom tricks using the Skill Composer
Introduction: Skill Composer
The Skill Composer is one of the included software programs inside Petoi Desktop App.
Using the Skill Composer, we will try the following project.
✨ Project: Dance Choreography with Skill Composer - Train Bittle X to do a dance from basic movements
Summary
In this lesson, we learned how Bittle X can be programmed using the Skill Composer to perform basic movements that can be made into a custom pet trick.
🐶 Projects with Sensors! An Introduction
Introduction
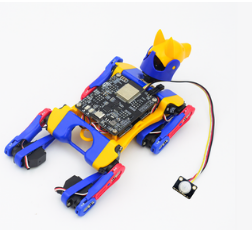
We can use sensors to do more projects with Bittle X! The sensor pack includes the Light sensor, Touch sensor, Gesture sensor, Motion Sensor, and Distance sensor.
Why use sensors?
Sensors are important because:
- They allow us to collect more data (light, distance, gestures, etc.)
- We can use that new data for project ideas, such as storing the data into variables and making Bittle react based on the variables.
- For example, Bittle can hold a bone, and if the bone is touched, Bittle will react by barking.
Intro to Sensors - A technical guide
- Light Sensor - measures brightness and allows Bittle to follow a light source. Employs two analog input pins in the Grove connector.
- Touch Sensor - includes two touch pads and works as a simple keyboard. Employs two digital input pins in the Grove connector.
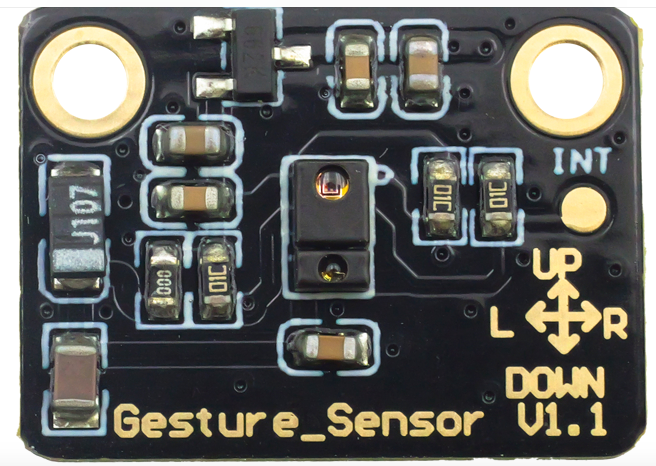
- Gesture Sensor - enables the robot to recognize simple top, down, left, and right gestures, making it possible to perform tricks. Employs the Grove connector 12C pins (SCL/SDA).
- PIR Motion Sensor - enables a robot to recognize the movement of a warm object, such as your hand, and makes Bittle capable of guarding a room. It employs one digital input pin for the Grove connector.
- Infrared Distance Sensor - enables a robot to detect the distances to the front obstacles on both sides. Employs two analog input pins in the Grove connector.
🐶 Topic 5: PIR Sensor (Motion Detection)
What You’ll Learn
- In this lesson, you’ll learn how to use the motion detector (PIR sensor).
Video Tutorial with Petoi Coding Blocks to Illustrate the Workflow Tutorial
A Motion sensor (PIR sensor) detects if there is any motion from another object.
How does a motion sensor work?
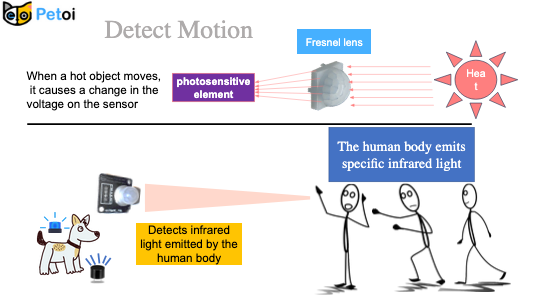
The sensor detects infrared light, a type of light that you can’t see with your eyes! Humans give off infrared light, so the sensor can detect if a human is present or not.
In this project, you’ll use infrared light to sense a human and to train Bittle how to react.
✨ Project: Sleepy Guard: Bittle X sleeps soundly until it senses motion. Then it sits up and barks
Summary
- A motion sensor can detect an object.
More Project Ideas
- Sleepy Guard: Bittle sleeps soundly until it senses motion. Then it sits up and barks.
- Hide and Seek: Bittle walks around and then stops when it senses someone or runs into an object.
🐶 Topic 6: Bone Touch Sensor
What You’ll Learn
- In this lesson, you’ll learn how to set up and use the touch sensor.
Video Tutorial with Petoi Coding Blocks to Illustrate the Workflow
Introduction
- A touch sensor from Bittle X’s bone has two sides. Each side corresponds to a different port/input, which we can use for our program.
✨ Project: Don’t Take My Bone - Bittle X reacts by walking backwards
Summary
- The touch sensor can be used to detect long presses or short presses
- The left and right sides of the touch sensor bone can be independently used as triggers for your program.
More Project Ideas
- Interactive Piano - Touch sensor plays a musical note.
🐶 Topic 7: Light Sensor
What You’ll Learn
- How to use a light sensor for your projects
- Learn the analog read block
- Make the head follow the light
Introduction
A light sensor detects the amount of light shining on it. Bittle X’s bone has two light sensors, and it can be used to have Bittle X follow or react to a light source.
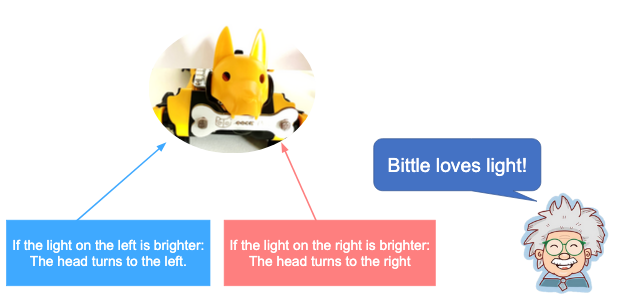
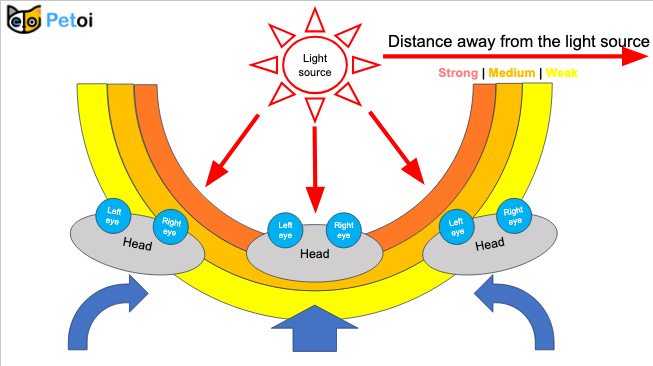
✨ Project: Follow the Light - Bittle X does not move until it sees a light shining on it, and then it follows the direction of the light
Summary
- Bittle X’s light sensor can be used for tracking the amount of light.
More Project Ideas
- Hide from the Light - Bittle X hides from any bright sources of light.
🐶 Topic 8: IR Sensor (Distance Detection)
What You’ll Learn
- You will learn how to use a distance sensor (IR) for your Bittle.
- Learn about reflective sensors and how to use them
- Print the sensor’s return value to the serial monitor
- Play sound when detecting obstacles
- Use the reflective sensor to recognize obstacles and count
Introduction
An IR (Infrared Reflection), or distance sensor, is used to detect how far other objects are.
The reflective photoelectric sensor is a photoelectric sensor that couples the transmitter and the receiver into one unit and uses the reflection principle to achieve photoelectric control. It can be used to detect changes in light and color of the ground, as well as detecting approaching objects.
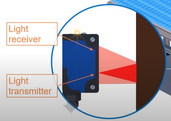
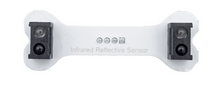
✨ Project: Personal Space - Bittle X automatically makes a sound or keeps a distance from people when someone gets too close.
Summary
- A distance sensor can measure the distance to an obstacle.
- To make Bittle X play a sound when it detects an object, we can try Task 1-2 and make the sensor trigger an event.
- To make Bittle X count objects, we can try Task 4.
More Project Ideas
Invisible Leash - Bittle X goes on a walk and avoids running into objects.
🐶 Topic 9: Gesture Sensor
What You’ll Learn
- How to use the Gesture sensor
Video Tutorial with Petoi Coding Blocks to Illustrate the Workflow
Introduction
- The sensor features advanced gesture detection, proximity detection, and digital ambient light sensing. Gesture detection can accurately sense "up, down, left, and right" and more complex movements.
✨ Project: Bark Patrol
Summary
- The gesture sensor can provide values
0,1,2,3which represent the hand movements of waving up, down, left, and right.- We can use this to trigger Bittle X to do actions!
More Project Ideas
- Make Bittle X turn its head left and right if you wave left and right on the gesture sensor.
🐶 Topic 10: Challenges for Student Projects
Student Project Ideas:
Beginner Projects
Make Bittle X Dance - Train Bittle X to do a dance from basic movements
Pet Tricks - Make Bittle X do your own unique pet trick.
Singing Bittle X - Make Bittle sing using the musical notes.
Medium Projects
Obstacle Course - Make X walk around objects in a simple obstacle course.
Personalities - Train X to show a personality through moods, such as happy, sleepy, or sad. Use sounds and movements.
Advanced Projects
Delivery Service - Make Bittle X walk in a set path to deliver objects.
Security Guard - Make Bittle X wander an area and then alert you when it detects something.
Interactive Storytelling - Make a narrative with Bittle X acting out different stories or scenes.
Fitness Buddy - Train Bittle X to do exercises and help motivate people for workouts.
Archive
Deliverable
Persona: Justin, 41 year old K-12 Teacher
Experience with Computers and iPads, but teaches STEM curriculum occasionally. Background in Ethnic Studies/Art.
Story: Island of Bittle
Sound Institute
Light institute
Sport center
Day 1
Goals:
- Learn how robots work
- Learn how to use mobile app or desktop app to make it move
- Learn how code blocks work
Lab: turn head
Lab: Make bittle sing
Lab: sit down and stand up
Lab: Skill composer, make dog shake hands
Lab: Stand up, sit down, say hello, loop forever
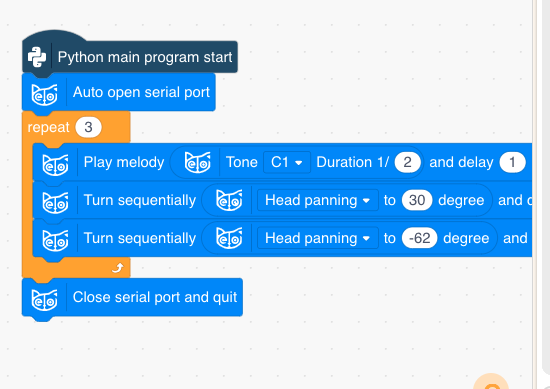
DIY Lab: Make your own action sequence
Day 2
Goals:
- Learn how to trigger an action with a touch sensor
Lab: Dog moves back when you touch bone
DIY Lab: Make your own action sequence based on a sensor
Day 3
Goals:
- Learn how to trigger an action with distance sensor
Lab: Dog will sit when you motion your hand from far away
DIY Lab: Dog will ___ when you motion your hand from far away
Lab: Dog does not walk into walls?
Conclusion: Robots